
Buy 2 or more projects and get 10% off at checkout

DIY Sim Racing Shifter H-pattern & Sequential - 3D models - upgraded version
€15,99
Skip to product information


DIY Sim Racing Shifter H-pattern & Sequential - 3D models - upgraded version
€15,99
You'll get the files via email within 5 minutes from placing your order.
MAIN FEATURES
-
Lifelike, sharp and mechanical actuation (try it if you don't belive it)
-
7-speed + R , or sequential, switch in seconds with the pull of a lever
-
Fully integrated electronics
-
Inexpensive to build (40-60€)
WHAT YOU'LL GET WITH THE PURCHASE
-
.3mf files for all the needed components and full .step assembly
-
Updated parts list with everything needed (also available HERE)
-
Detailed STEP-BY-STEP build instructions
-
Circuit diagram
-
PDF with some useful build tips and other handy information
-
Arduino code needed to make everything work,
3D PRINTING SETTINGS
| Material | PLA+ or stronger |
| Walls |
4 |
| Infill |
20% |
WATCH THE VIDEO TO KNOW MORE
You may also like
A
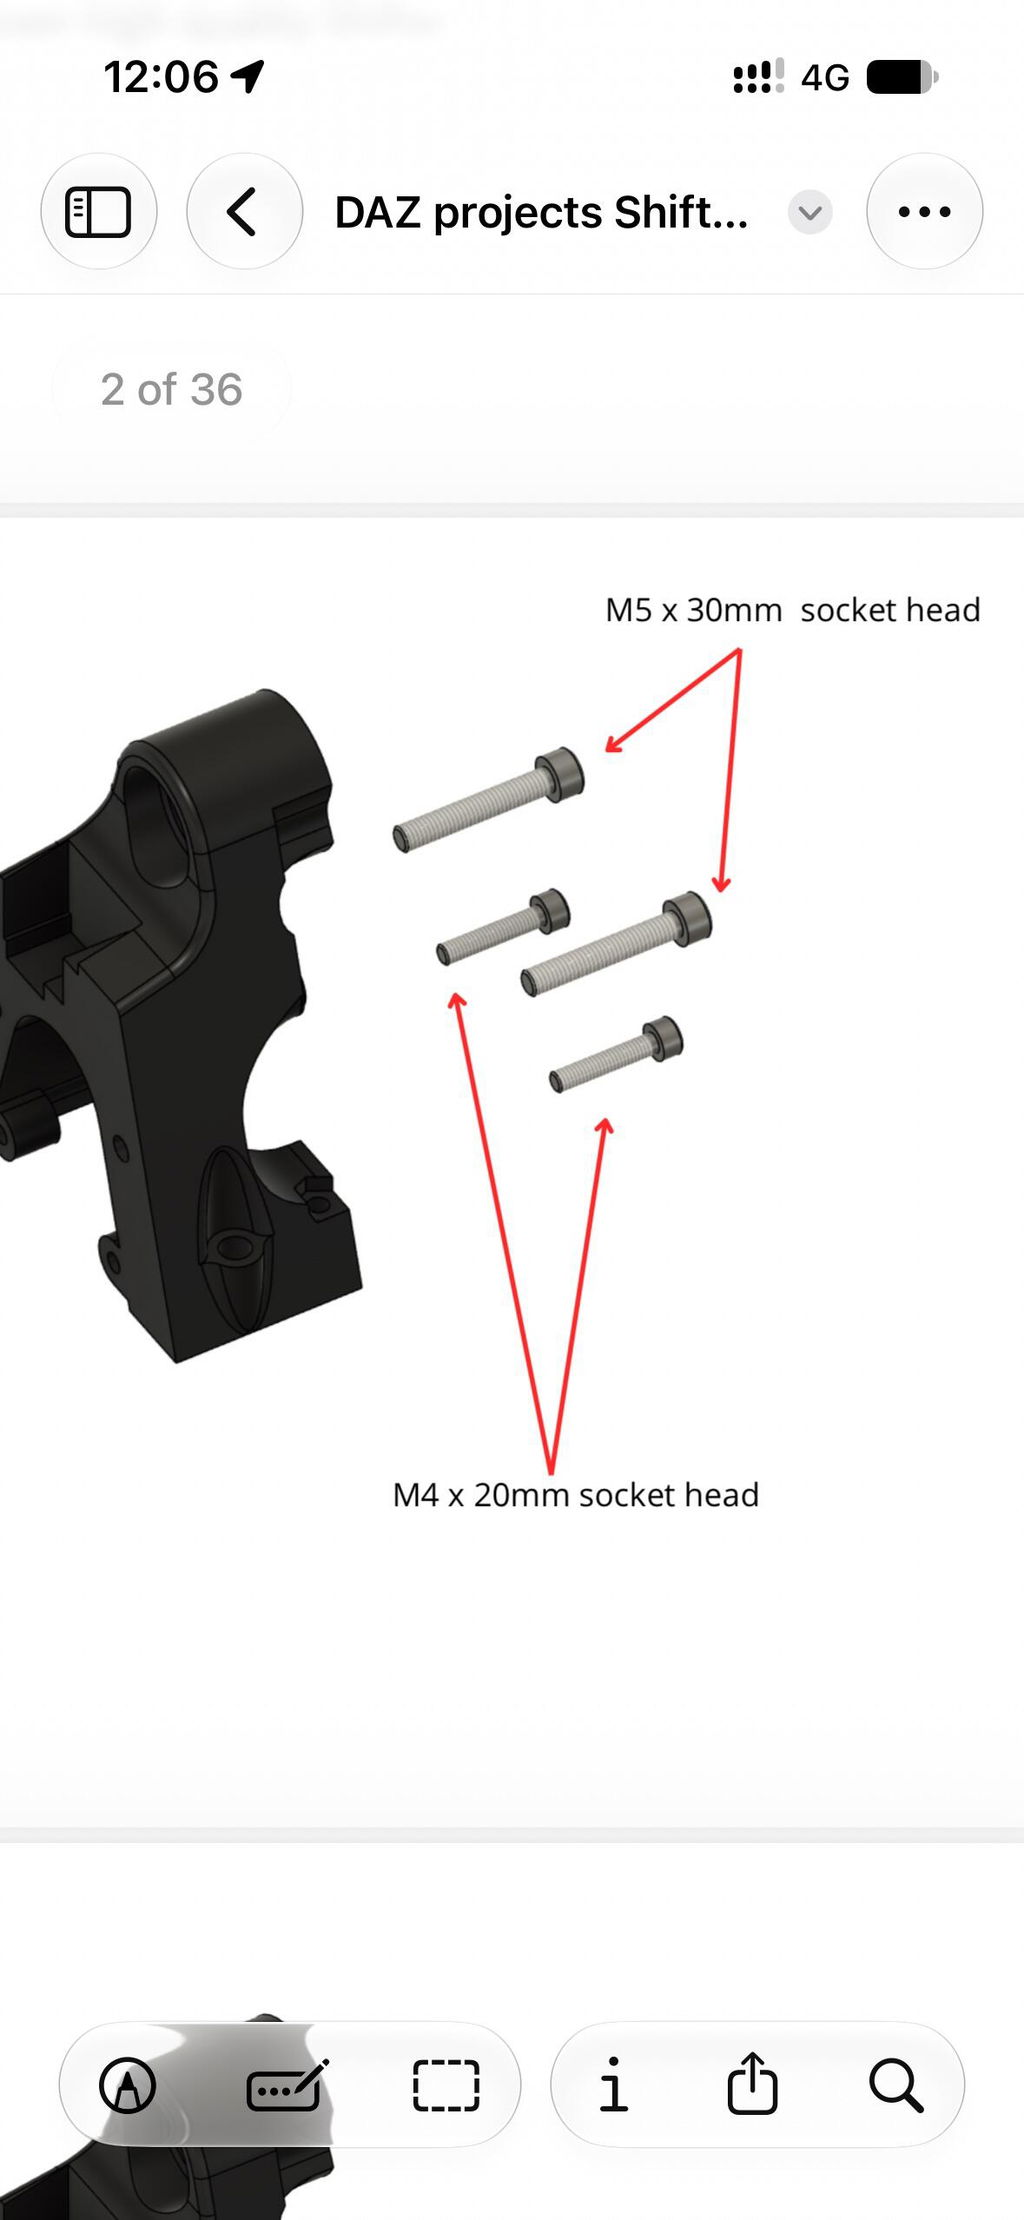
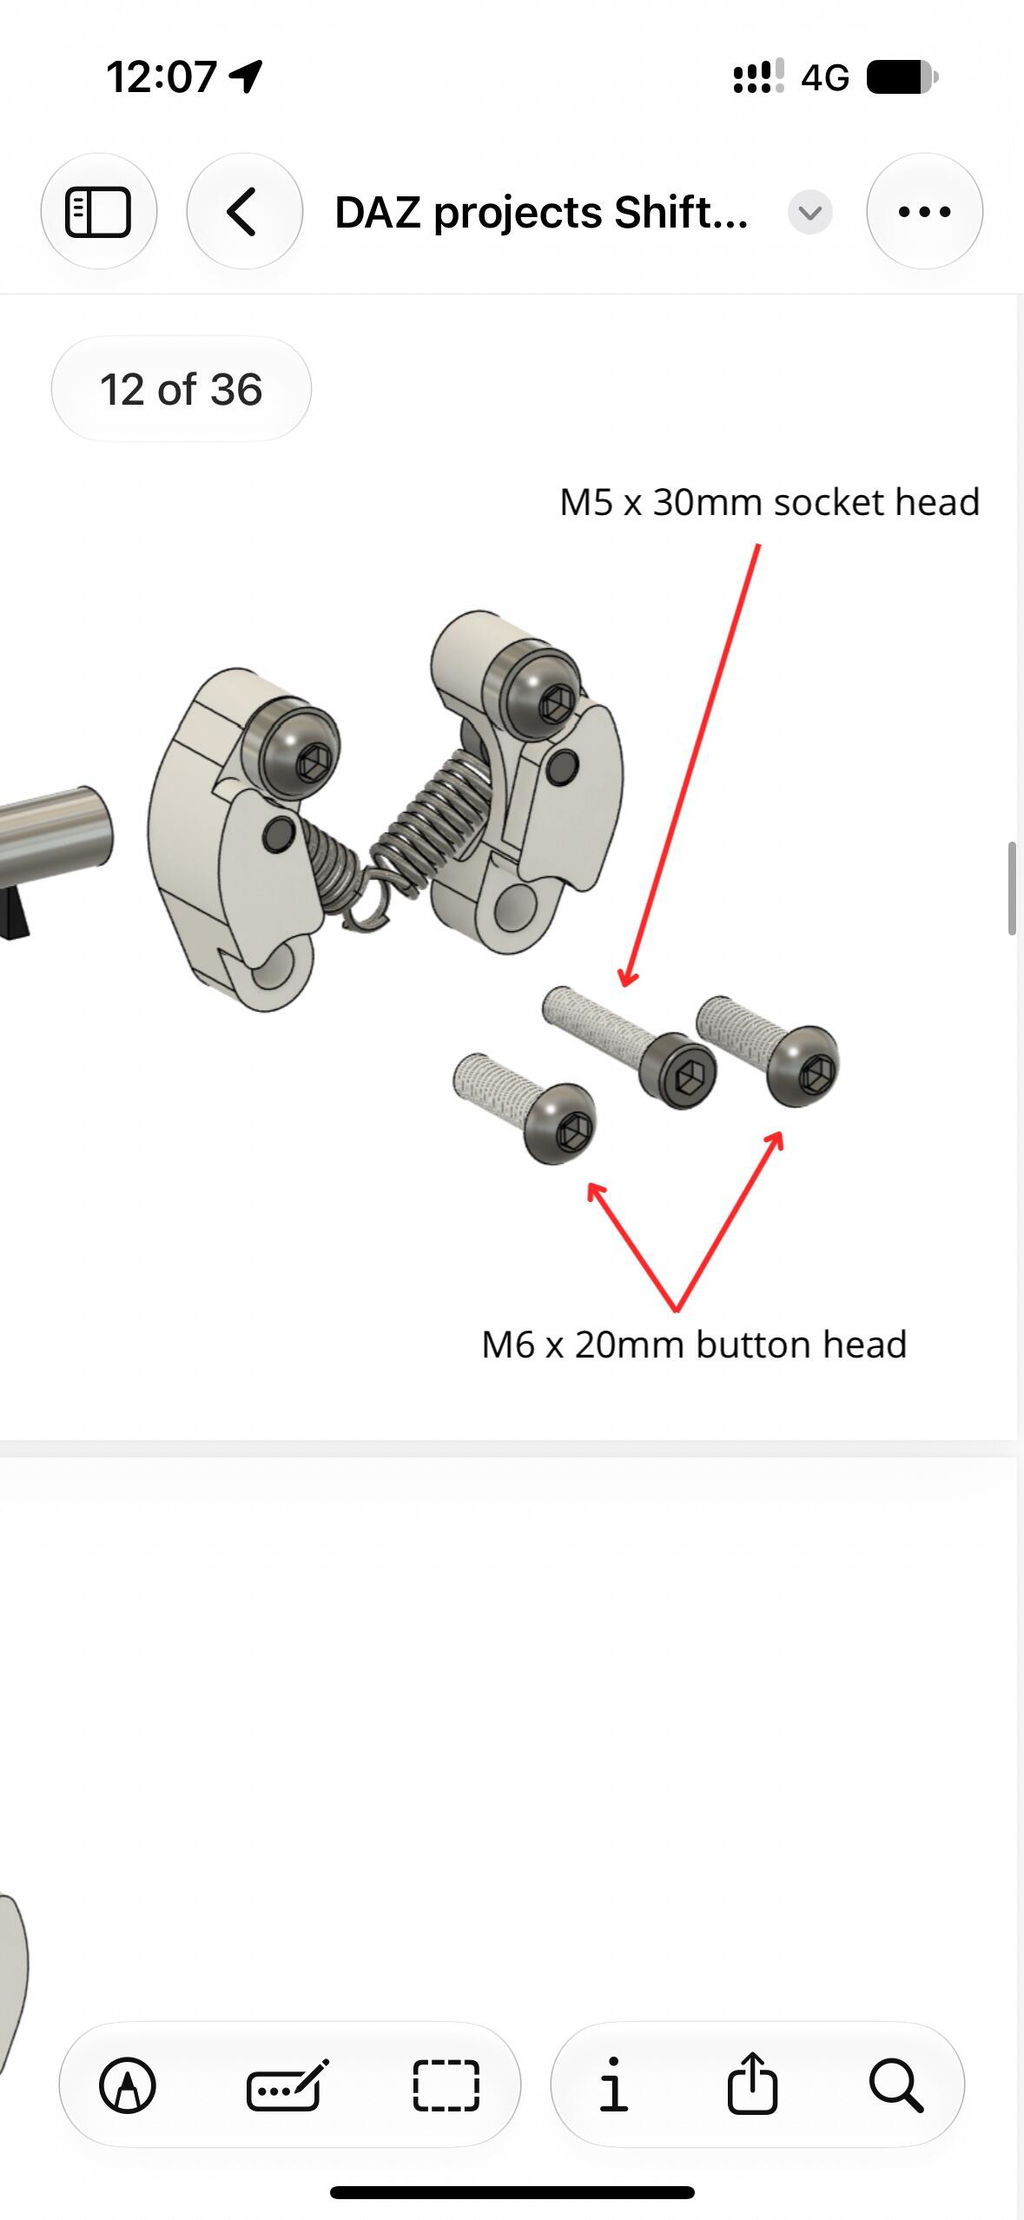
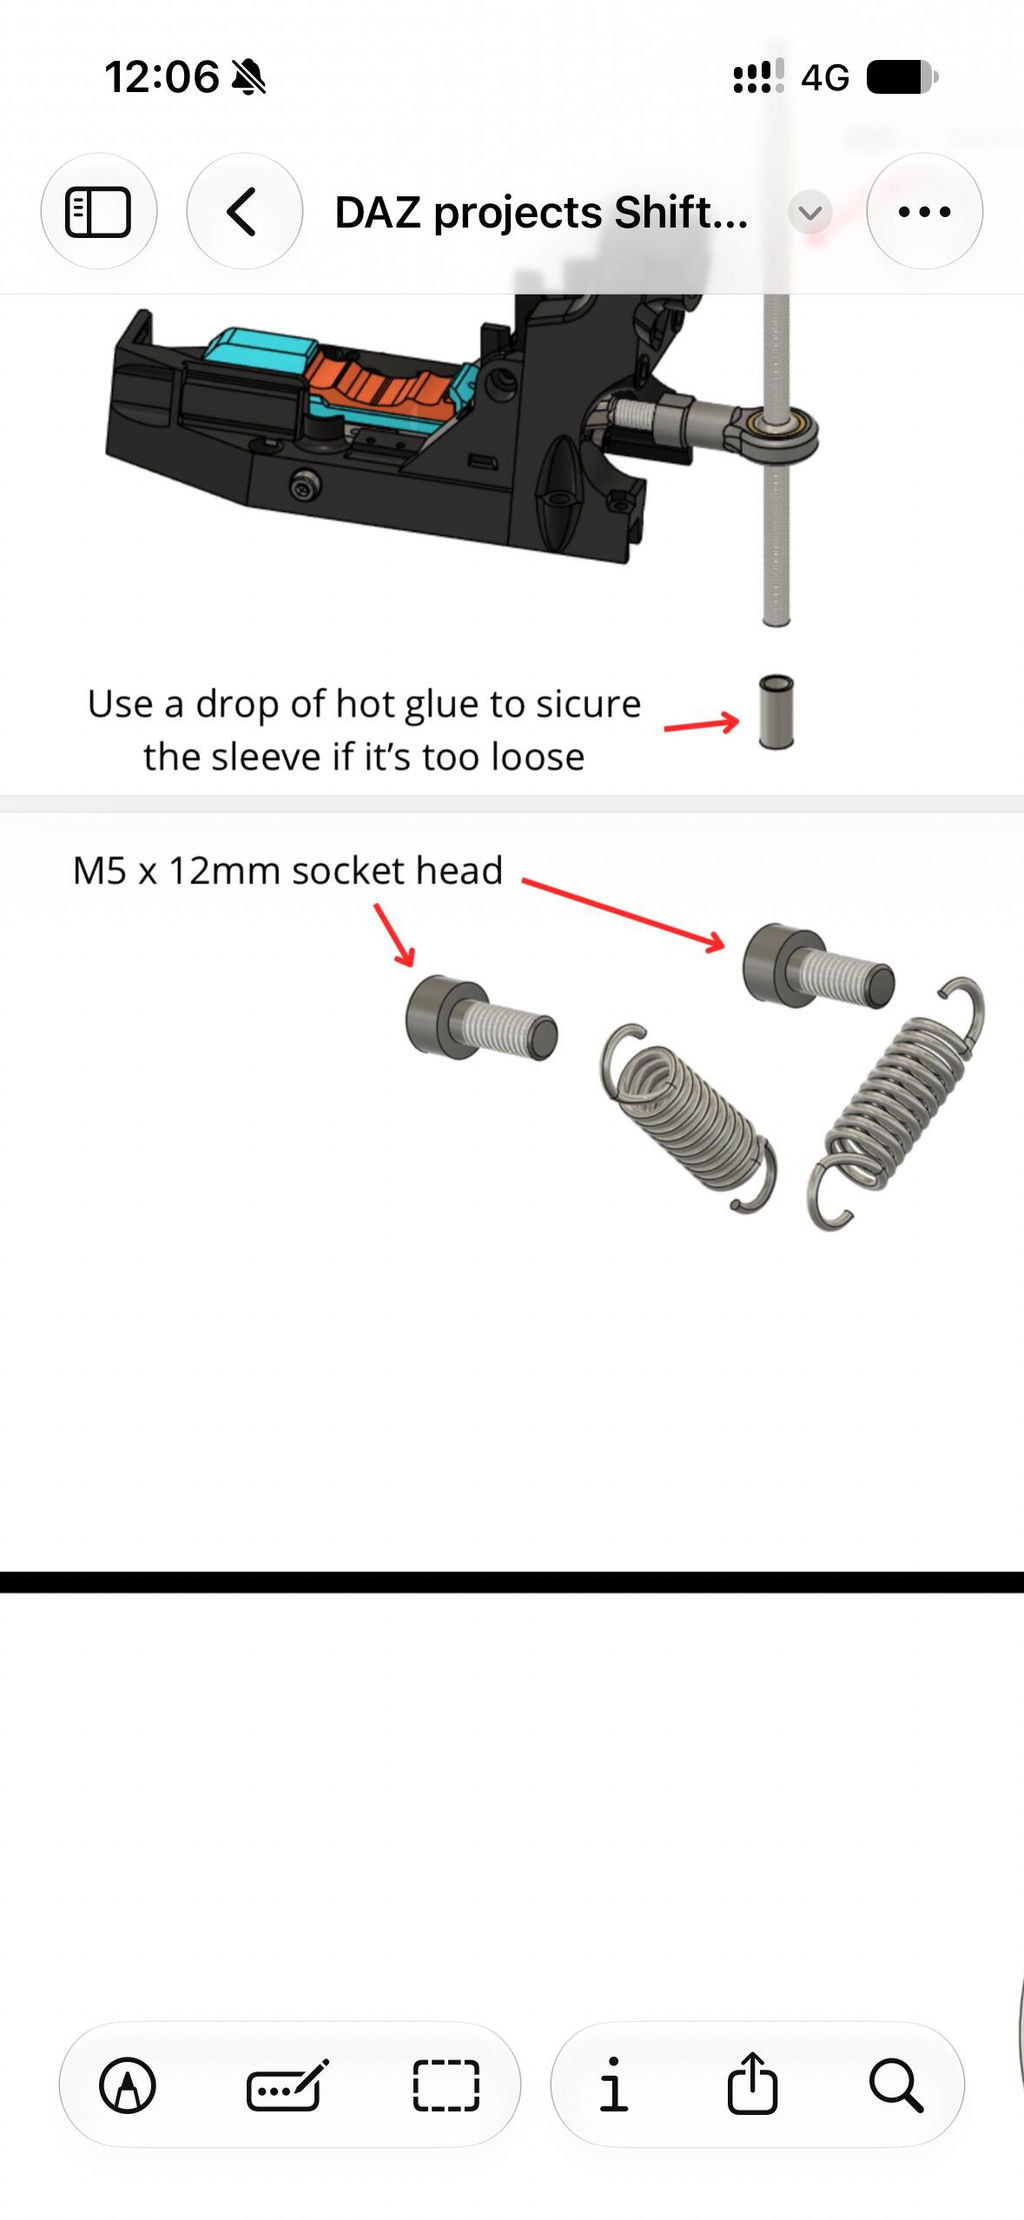
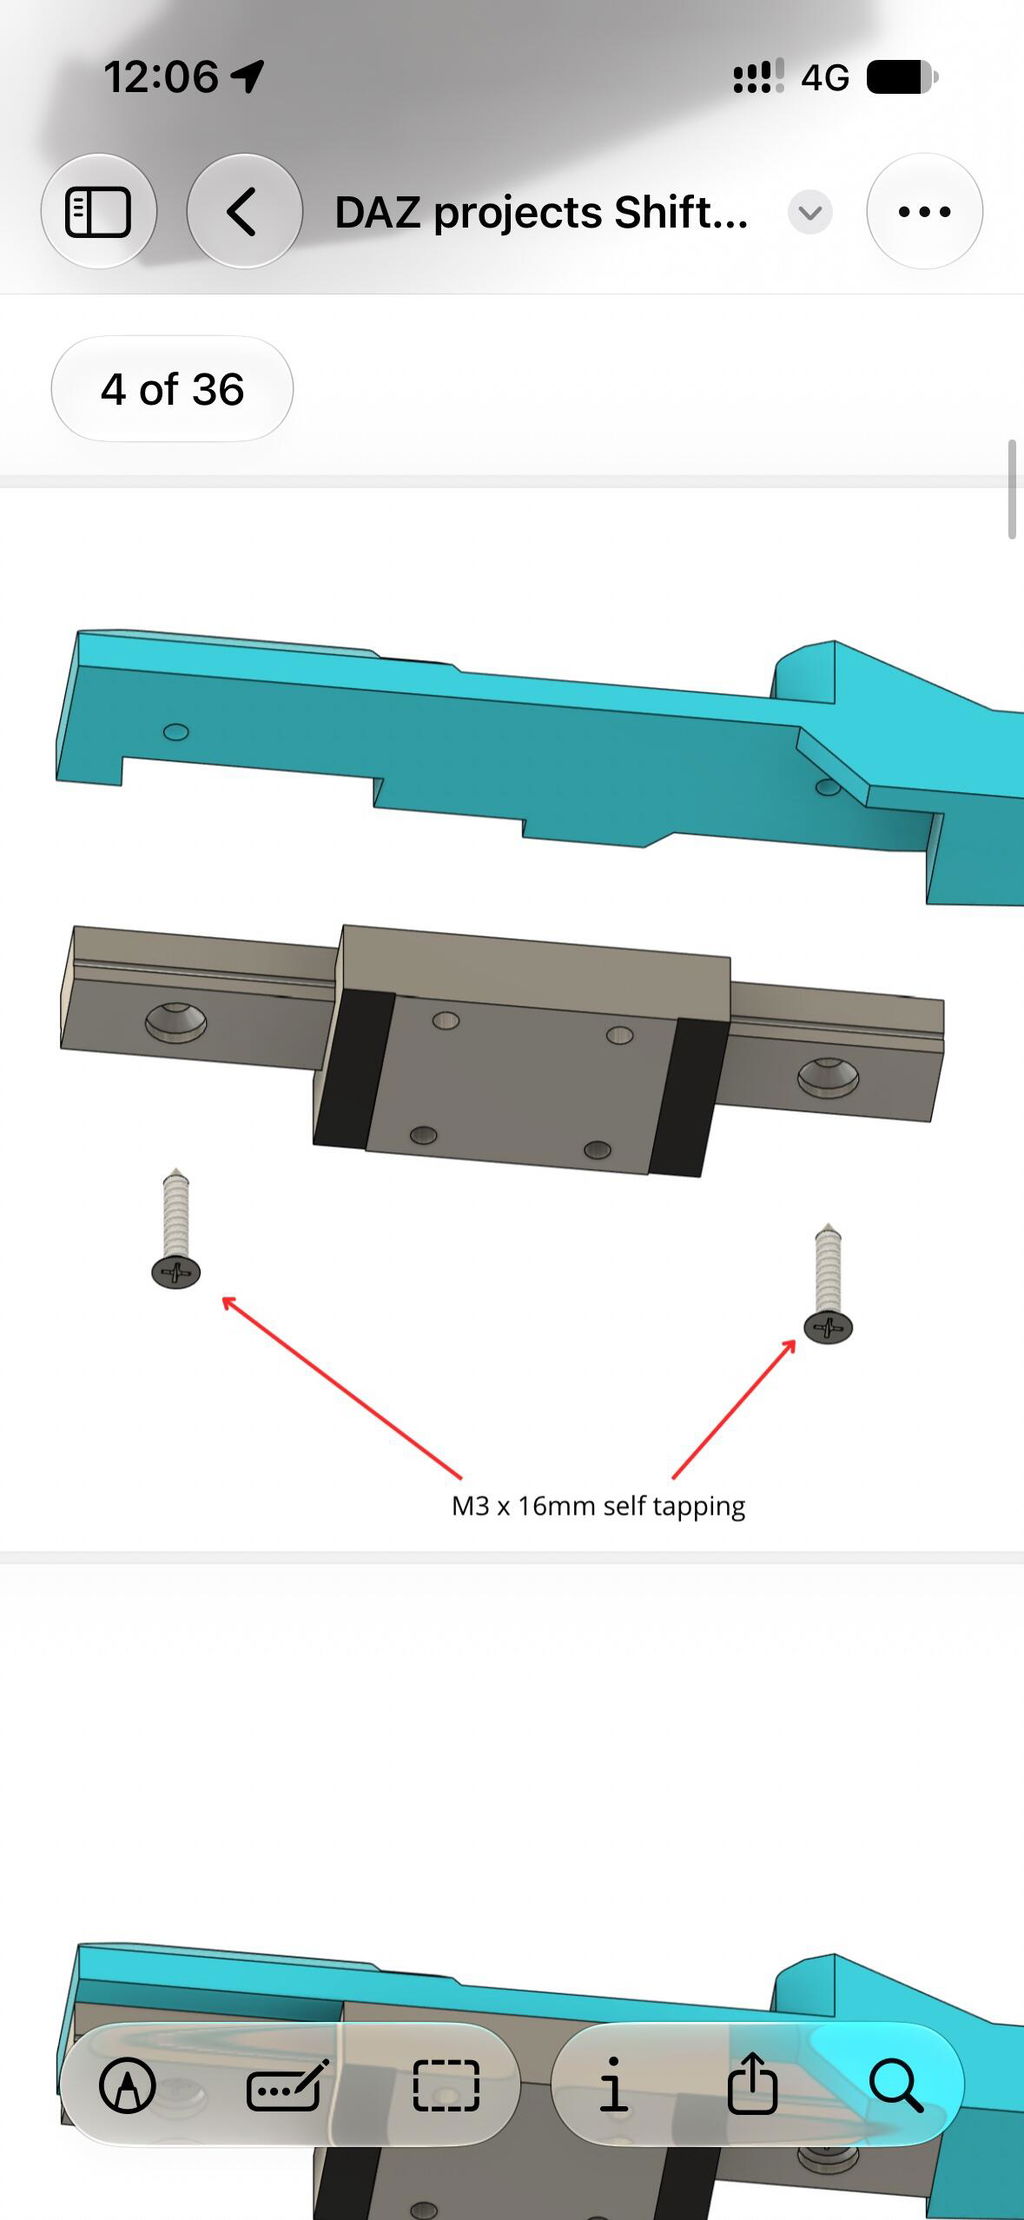
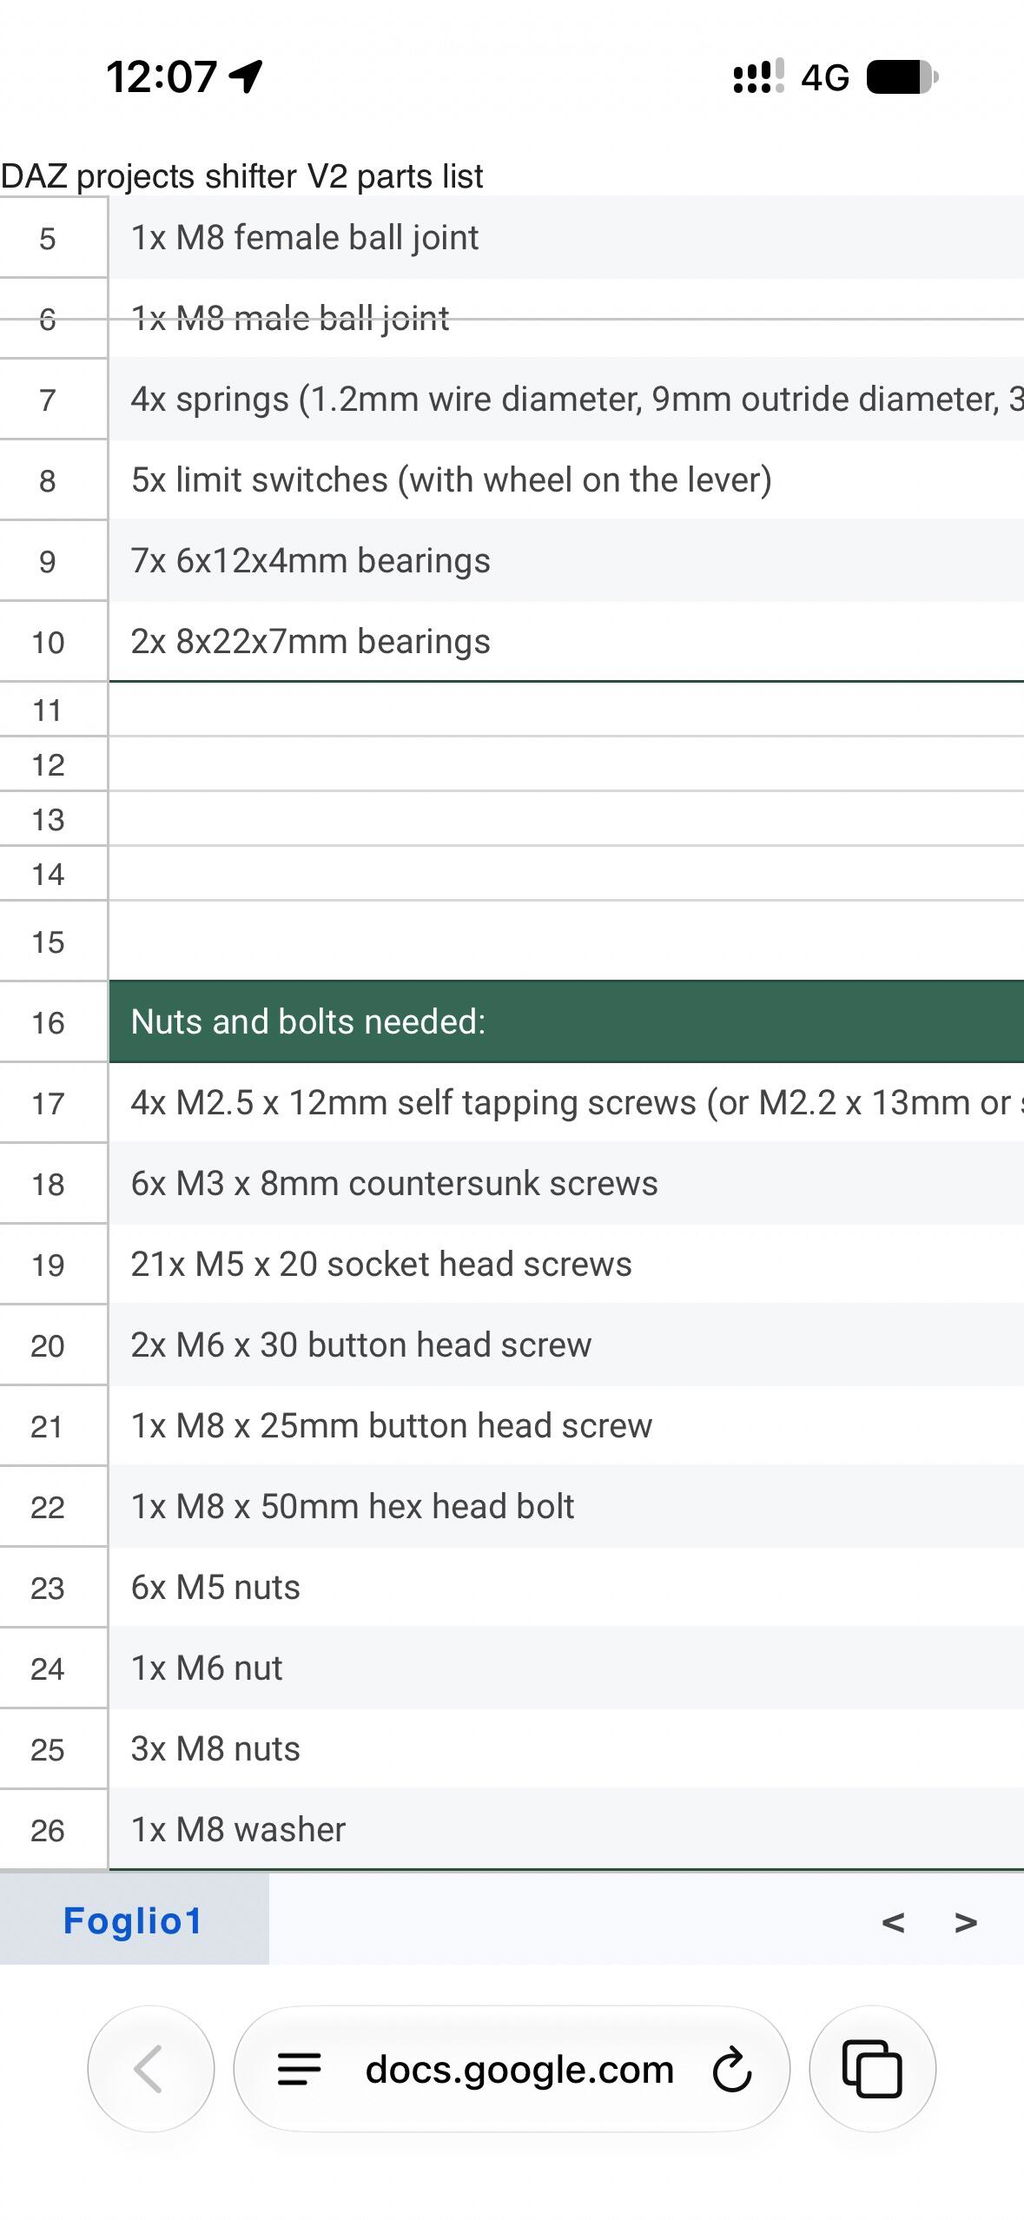
The part list doesn’t match the assembly instructions
Hi,
Thanks for the review, actually the instructions you're looking at are now outdated and have been updated with the latest desigh revision, where the screw variety was minimized to fewer different types. if you didn't automatically receive the updated files please let me know through the support form.
Thanks!
F
Hi,
sorry for my poor english, but I'm Italian like DAZ :). I printed this shifter 1 month ago and after this month of usage I can say that in terms of usage and feeling, the shifter is fantastic and pretty solid, I am very happy with that, specially thinking of how much I spended to built it :).
If I should say something to be fixed/upgraded, I would say these 3 things:
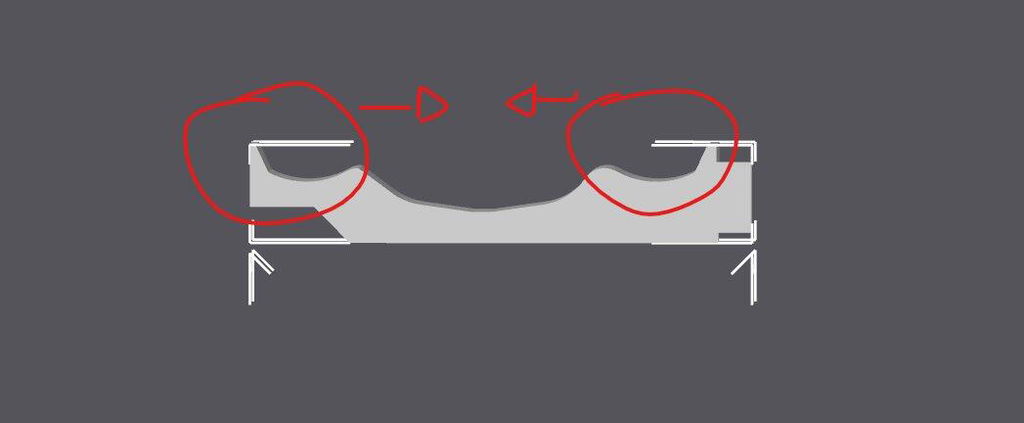
- the travel between the start of the vertical movement (like 3th to 4th or sequential + and - ) is a bit too loose compared to another shifters, as I show in the video I attached. I would like to have a shorter travel before the gear gets in, I think that could be resolved shrinking the indexer's bearing housings, like the photo attached shows
-I would like a "secure system" to prevent accidentally select 7 or R gears, like a stronger force to engage that part of the H pattern or like a lever to be pressed while selecting the gears
-I suggest to add to the 3D printing settings you provided, the correct object orientation to be printed to ensure the maximum resistance while the object is stressed
That's all, I wanted to share all my constructive feedback to improve this already fantastic shifter, I also wanted to mention the way too type of screws to assemble the shifter but I saw DAZ already received other mentions for this and he is working for that.
@DAZ
if you want additional detail about my usage/feedback after 1 month, you can write me on [****] or @mr_pavons on IG.
Thank you,
FP
h
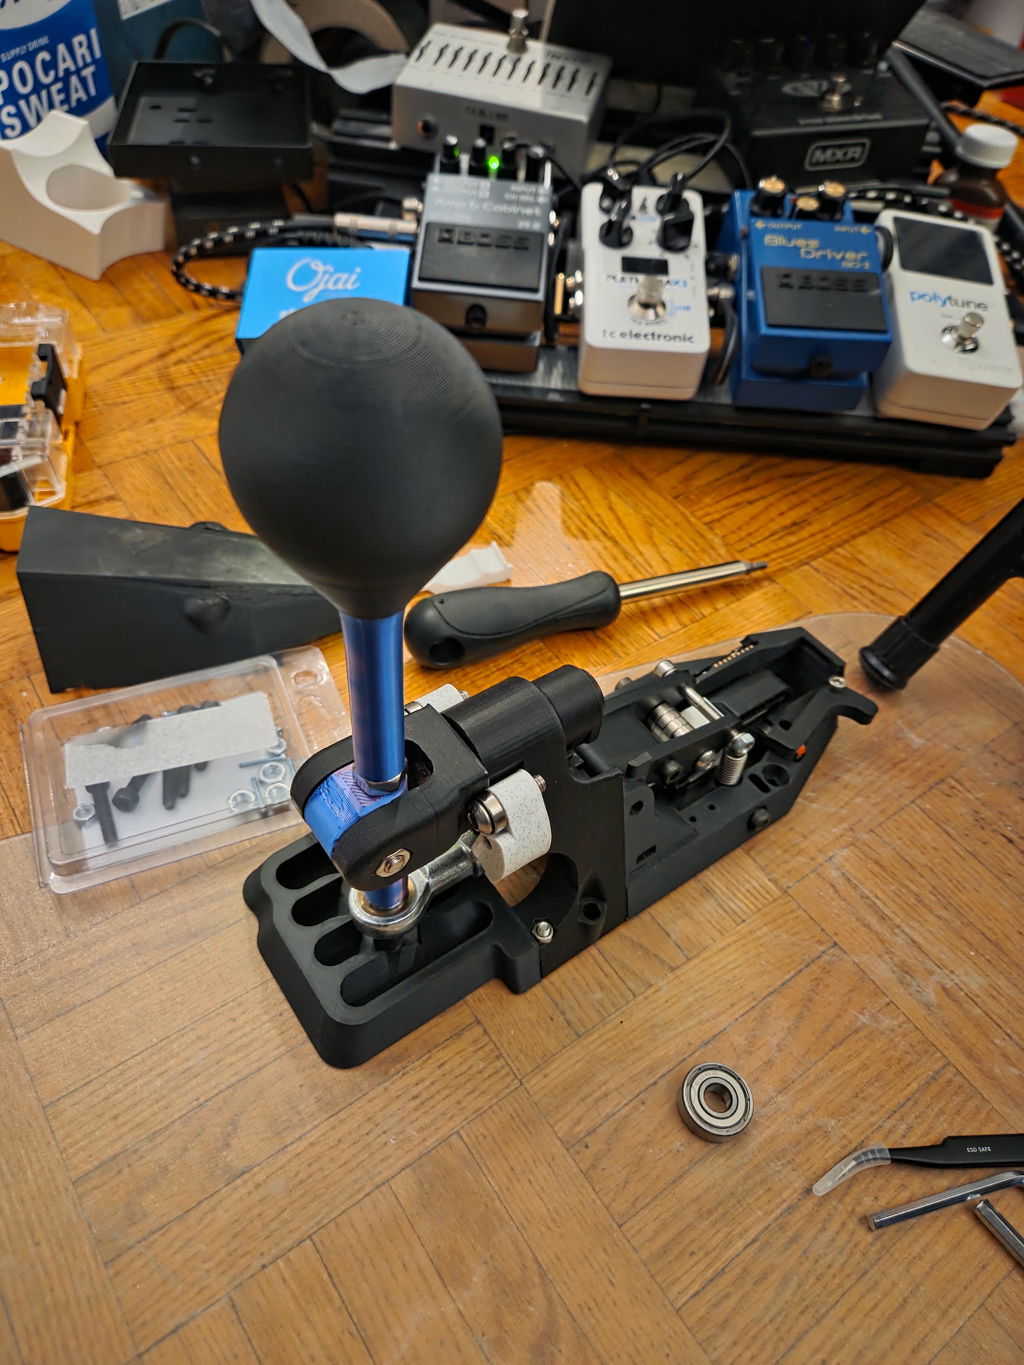
A nice shifter in the end, I spent around $100 buying the parts for the shifter. I quite like the engineering of the shifter and I think it was well done! However, I do have some critiques.
The build instructions, specifically the wiring instructions, were relatively unclear. I had to ask DAZ directly about the wiring instructions, because the wiring diagram didn't show how to wire the shifter and the wiring was shown for only 1 second in the video. It would've been nice to have seen reference photos of what the wiring would look like.
I didn't really like how many different types of screws had to be used for this build, since that made it hard to source parts at a reasonable price.
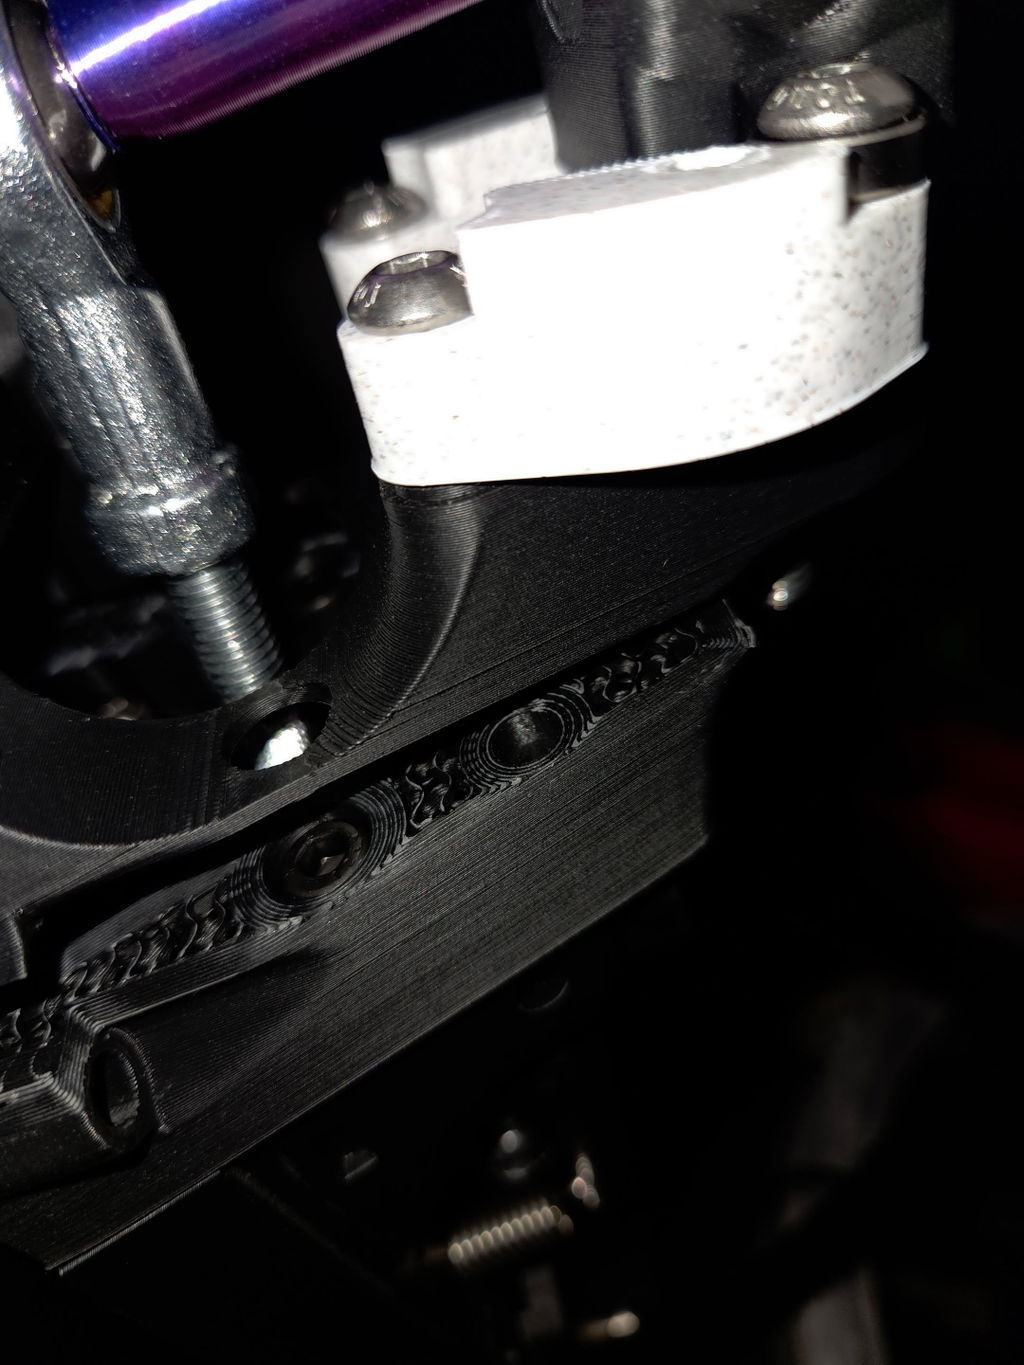
It'd also be nice to have better guidance on the specific orientation when printing the parts rather than "orient them using the automatic orientation tool inside your slicer to get the most eficient printing orientation", because the automatic orientation often led to parts printed in ways where they'd snap on the print lines. I've had many parts that I had to print because they snapped on layer lines, and had to reprint on different orientations to try to fix the issues.
I also had to fiddle around with the main pivot a lot in order to have the switches actuate properly when turning the shifter side to side. There seemed to be a very small window of alignment where it would be properly aligned.
I think it'd be good for screws that are meant to be repeatedly removed to use heat set inserts instead of relying on tolerances. The screw that secures the centering arm to the body could've used an insert, since I had to remove that one a lot when switching the indexer resistance.
Overall, a pretty product, but I feel that there will be notable refinement needed. Will have to see for long term reliability of the shifter, but it seems solid so far. I hope that since I bought the v2 shifter I'd have some form of discount for a potential v3, as v2 feels like a stepping stone towards a nicer v3 and I'd love to build that too if it were cheaper for v2 buyers.
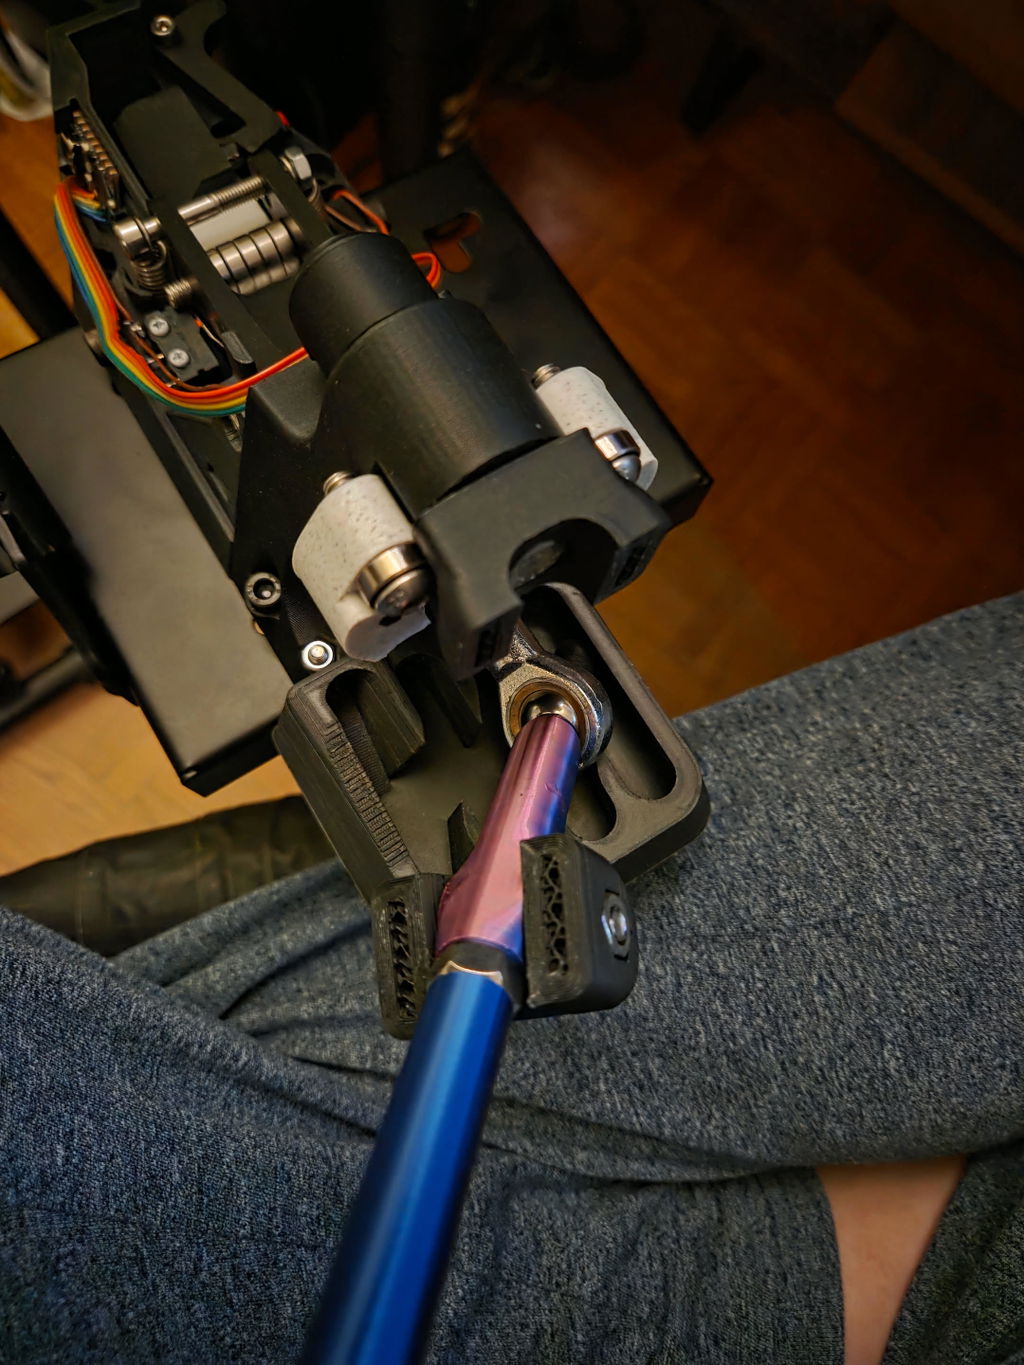
Hi,
Thanks for the feedback, I'm glad to announce that I'm currently working on a version 2.1 with some improvements in therms of screw variety and slight design tweaks, if you think the schematics diagram is not clear enough I'll include some wiring pictures to help with that, the same also regarding print orientation.
Keep an eye out for these improvements, if you have any other suggestion please write me an email, I'll be happy to implement them!
V
Too expensive for a product that is still at the prototype stage. The tolerances are poor; the lever spins on its own axis, and when shifting from 4th to 5th gear, you can easily end up in 7th. Even though there has been an update, it only confirms what I mentioned earlier—it’s still essentially a prototype. The screw lengths are specified excluding the head, the manual is incorrect—there are just too many little issues that shouldn't be present in a finished, manufactured product! That said, it is functional, but it makes a lot of noise.
Hi, thanks for taking the time to leave a review. I'm sorry the experience didn't meet your expectations.
Just to clarify: the shifter is a DIY 3D-printed project, not a finished commercial product. It needs some assembly and sometimes a few small adjustments accordingly to your specific printer settings and materials, some printers have tighter tolerances than others and if the holes end up too you can just offset them through the appropriate setting in the slicer and get the correct tolerance.
That said, if something isn't working as it should, I want to fix it. Send me a private message describing the issue (photos or a video help a lot) and I'll help you until everything works properly.
The issue with the shifter going into 7th gear it's been solved in the latest iteration with an extra step in the side to side movement that avoids the lever falling into 7th gear.
Regarding the cost I can't unfortunately do much about AliExpress tariffs, but I'm working on a complete hardware kit to reduce costs even more in the future.
Thanks again for the feedback!
R
I really like your shifter! It's a fantastic project! The only thing I'd love to see is a mechanical reverse gear lockout, just like in a real car, to prevent accidentally shifting into reverse. It would be a great feature to add in the future!
R
It is a very nice design and works very good as well. I added a large 7 segment display to it to show which gear has been selected, the tricky bit was when using in sequential, but worked it out OK. I had to make new code so that it all worked together.
H
Super notchy, very customizable aswell, although the price ended up being closer to $100 USD it was definitely worth it compared to some of the other shifters on the market at a similar price point
M
overall great shifter and supper fun build. my only 2 complaints are that the sequential lockout needed to be modified to work as intended and that there is no way to lock out 7th and reverse to make it a 5 speed. I did make mine with the old files as I already printed everything by the time the revision came out so the sequential lockout issue may have been fixed. would build again.
C
I got the issue fixed by doing what I 100% should have done before reviewing, I restarted my pc
C
I built the shifter and installed the firmware, and all that went smoothly, but whenever I went to plug the shifter into my gaming PC the sim games I tried on it didn't recognize it, I tried BeamNG and Asseto Corssa, and both didn't assign the gears to the shifter, then an error popped up saying the device "malfunctioned" and so I unplugged it and re-plugged it and it still just didn't work. I'm not sure how to fix this as I've simply followed the instructions.
(EDIT: The problem was an easy solution, that I 100% should have done before, just restarting my computer, everything works perfectly now)
h
Update on earlier review: The support was fast and excellent, and he released an updated version that addresses the issues that I noted in my earlier review! Adding an extra review star for the excellent support
A
This is my second review. In my first review, I expressed my concerns about some of the design choices. Davide Zanetti responded by thanking me for my feedback. Less than 24 hours later, he reached out to me privately via email to let me know that he had made improvements, uploaded the updated files and provided suggestions for print settings.
I’m genuinely impressed by how quickly he made these changes. It’s great to see a creator who takes feedback seriously and is willing to improve their designs!
Now with the new improvments I think this shifter is perfect. The shifts feel great, instructinos are clear and I love the cover.
For context this is my first review:
I have to disagree with some of the design choices. Many of the screws rely on undersized holes to hold them in place. While this works well for parts that are only meant to be screwed in once, the holes become loose after repeated use, meaning the screws no longer hold securely after the second or third installation.
On the other hand, some screws are not secured at all. For example, the screws on the clamp that provides resistance against the shifter's left and right movement, leading to some screw poping out.
The shifter knob and the plastic part that fits into the shifter gate are not secured by any locking mechanism. While this might be acceptable for the plastic gate insert, it is simply unacceptable for the shifter knob. I've lost count of how many times the knob has come off while shifting.
WHY SO MANY DIFFERENT SCREWS????????
The rest of the shifter (if it stays together) however, is great. The shifts feel fantastic and the cover is a brilliant idea.
Hi,
Huge thanks for the feedback, it's much needed to refine the product into something that always keeps getting better.
Regarding the problem you had with screws not holding it's probably because the tolerance of your printer are different to mine and the holes ended up slightly bigger than what I intended, making the screw not hold securely. Still this isn't an excuse and I'll definitely think if a more universal solution.
Regarding the shift knob and the huge number of different screws, I'm already planning to share an update to this design, that uses a nut inside the knob to secure it, and also eliminated 80% of the screws needed, so most of the problems you mentioned are already being solved!
Thanks again for the feedback!
A
A very nice shifter but, the instructions are pretty unclear. The directions on the wiring and software were confusing enough for me to ask DAZ directly about it. And in the video he did about the shifter, he said it would cost €50, and promising price is not a good idea. This shifter costed me about $150 dollars in the end and was not worth what I got for what I paid.
Hi, thanks for the feedback an update is now available and it fixes some of the issues you mentioned, regarding price it obviously changes depending on where you live, but in my next video I'll make a cost breakdown showing that the total cost for me was actually around 50€
F
Just built mine and it is great. But you can sometimes use other hardware than the one used in the manual. For example you can bore out the limit switches to 3mm and just use normal m3 screws. Also the cam part that pushes the two switches needs really good alingment to function properly (i had to slightly bend the switch lever aswell).
R
I’m not someone who usually leaves reviews, but this project really deserves one.
I’m genuinely impressed. The quality is outstanding, the engineering solutions are brilliant, and you can really see the huge amount of work and passion behind it. One of those projects that makes you say “wow” over and over again. Seriously, an amazing job! 🔥
My only small suggestion would be to reduce the number of different screw types and sizes, mainly to make assembly and purchasing a bit easier and cheaper. Maybe a little more work on the aesthetics too, but these are really minor details.
Absolutely fantastic work. Congratulations! 👏🔥
B
Everything is very well done and prepared, but when ordering to EU the parts and shipping come to about 80€ and the 3D printing materials about 10-20€ making the whole build cost 100€ which doesn't justify building it vs buying something prebuilt.